Blog

Top factors that make a great photograph

You have heard the adage that a picture is worth a thousand words. Of course you also know that some pictures are hardly worth looking at, so that would be more like one word; yuch. Here is one of the most important factors that makes a great photograph. Hint, it's not your camera.

F-8 and Be There.  Back in the heyday day of newspapers, the editor would tell the photographer where to go to get the shot they needed. The cameraman would set his 4x5 Graflex camera at f-8, pre-focus the lens at 8 to 11 feet and install a flash bulb. When he made the exposure at that distance, it was framed, in focus and properly exposed. Today, the cameras have advanced exponentially, but you still have to be there, on time.

The photographer has to be at the right place at the right time in order to capture the best photograph. It doesn't matter if it is a drone aerial, a wedding portrait, a sunset, a celebrity or one of my signature twilight elevations. If you are not at the right place at the right time, you could miss the critical event and fail to capture the money shot. So the number one thing that makes a great photograph is preparation. You need to know where to be, at what time and then be prepared with the necessary equipment to get the job done. Instead of film and flashbulbs, you will need every devise you use to be properly set up and charged. You will need to know where to meet, what time is best based on weather and the sun position, and then allow for sufficient set up time prior to the event.

That way when you click the shutter, it was not luck that allowed you captured your shot at the best time and place.


Univ of Delaware STAR Tower aerial elevation at dusk

Best of Houzz again this year!

We have been winning Best of Houzz each year since 2013.

We have been winning Best of Houzz each year since 2013.

Have you heard of Houzz?

Houzz.com is an interesting website. It is used by members for making "Idea books" from photographs collected on their site. The general public (Members) collect their ideas of beauty in digital form, which become virtual scrapbooks. These are presented to a creative professional (Pro), who in turn helps the member turn their ideas into reality. Interior Designers and Architects probably get the most business from it, followed by specialty Contractors, custom Builders and yours truly.

While I may not benefit directly, my customers have the branding images that get noticed, and that brings them business. It helps when one of the Houzz editors picks up a photograph and gives it a wide distribution in a story. As a result, some of my photographs are in tens of thousands of Houzz Idea books. When one of my customers mentions me as the photographer of one of our projects, it is posted to my Houzz site, which is good for both of us.

I invite you to visit my Houzz site, see the projects posted there and perhaps dream up your own Idea book.

Design Home photography

I have had the good fortune of photographing the Philadelphia Magazine Design Home annually for about 10 years now. It is a specialized type of photography that we call advertorial; a combination of editorial and advertising photography. In this case, the magazine wants to present images that demonstrate unbiased, graphically interesting architectural views of the home. At the same time, paying vendors and sponsors need to have their product clearly and well presented.

The project is always very challenging for the builder. They face the task of trying to complete a large and unique project in a limited time with some unfamiliar subcontractors and changes that come along the way.  I need to be present during final completion of the project to help coordinate when we can start, what can be photographed and what remaining details of construction might need to be completed during photography.

Of course, one would like to think it is all very glamorous, but in truth, I am a project manager as much as I am a creative photographer. This time, the first day of photography was spent making the front elevations and preparing for the marathon of photography that would follow.  Here is a photograph of me at the end of the driveway at the position for the twilight elevation.

2014 Design Home dusk elevation preparation


You might be curious. Why here? These are the factors that directed my choice:

• Several interior rooms and rear exterior areas were not yet finished. The front elevation was doable if the vehicles, painter's ladders, construction debris, etc, etc, was removed from view.
• I always try to do the most challenging and important things first.
• We wanted to make a dramatic twilight photograph for the magazine that shows off the work of the builder, architect, lighting sponsor, landscape sponsor, ironwork sponsor, interior designer, etc.
• It was not raining and the timed exterior lights were functioning. 
• I needed to be about 8 feet high to see over the stone gate post. This was to essentially make it appear smaller. At eye level, it would be a huge object in the foreground if I wanted to show the light fixture on it. The extra height also allows you to see more of the landscaping and the shape of the driveway, etc.
• I don't carry an 8 foot tripod, the bed of a dump truck was too limiting and the roof of a car is too unstable. I have used scaffolding, but the wood spans were so flexible that the camera bounced with the rhythm of my heartbeat. This time we lashed the tripod to step ladders and stabilized it with a camera bag. A CamRanger was used to operate the camera remotely.
• The house was designed to have a pergola attached to the left side that would act as a cover over the parking space and visually complete the massing and roof pitches on the main part of the house. Without it, I wanted to avoid showing the truncated left side, mostly by highlighting other things that I would prefer that you look at. For example, I allowed that side to go dark and then highlighted branches on a tree in the foreground to mimic the missing shape of the pergola and create lead-in lines past it. We also lit areas of the back yard so that you would look beyond it. We wet the driveway to bring areas of interest and contrast to the front. We lit the gate in a way that its vertical lines lead your eyes back to the focal point, which is the front door.


This year, the 2014 Design Home is in Wyndmoor PA. If you are local, it is worth a visit. You will want to dream about all that is possible in your current or your next home. I can't show you the finished photograph yet, but you can go here to see it and find out more about the project.

Blue Hour photography of our coIN Loft


It had been a year and a half in planning and 3 months in execution, but our shared coIN Loft office renovation is finished. Credit goes to the Start-it-up Delaware founders Wes Garnet, Steve Roettger and Mona Parikh for the foresight and execution of the project. Katie O'Hara was the Interior Designer and Mona was the project manager.

Now the space is available for additional tenants. Helping attract them is where I come in. High quality architectural photographs on websites, tweets and blogs will let viewers know that this is an entrepreneur's ideal office space. Its look rivals that of any Soho, LA or Frisco coop workspace.

We decided that the blue window twilight look would be the most dramatic way to illustrate our space. Blue windows, white walls, black furniture and red accents were the major colors that would harmonize and contrast. The project owner would want the space to look open, inviting and vibrant.  Every detail, texture and color used to achieve that end would be in the interest of the Interior Designer.

We did 4 photographs on the upper level with one camera and 2 on the lower level with a second. Since the Blue Hour that we are interested in lasts only about 15 to 20 minutes, timing and planning is essential. For this blog, I will discuss how we managed to make the all views in time.  In another I can demonstrate the layering techniques that make the finished view. 

We all know that it gets dark when the sun sets. There is a great little site called suncalc.net that even predicts exactly when that occurs. Easy and simple right?  Now factor in cloud cover, exterior lighting levels, interior light intensity and color, direction of the window relative to the sunset and the time exact time is quite nebulous.  It is not so obvious as to exactly when the camera will record the sky as blue and the wall as white in a single exposure.

Of the 6 views, 2 were made before the optimum time, 3 were made during and 1 was made after. Here are the 6 views with the time stamp:

7:41 PM
This was made one hour before the peak Blue hour for the front of the building while the sun was setting on the back.  The excess blue cast from daylight on the the floor was removed. Accent light painting on the background increased contrast and brought attention to the large plaque. Window detail was added from darker exposures.

8:07 PM
The camera was turned around and this view was made 1/2 hour before peak Blue hour.  The blue cast on the floor was corrected and windows from shorter exposures were added like in the previous image.  This time additional exposures were made specifically to light the brick wall, which were painted in.

8:38 PM
The camera was moved to the conference room. The brick wall and the backs of the chairs were lit while we waited for the optimum blue window.

8:43 PM
Within 5 minutes of the exposure made in the conference room, this view was composed in time to capture the blue window.  Having this one in the bag, the camera could sit and wait until the next image was finished. We would return later to light the furniture and the brick wall.


8:52 PM
The second camera had been set up for a while at this position.  The front window was captured about 10 minutes earlier and the uppermost window was captured with this exposure. We were careful not to position a camera or light in the window of this camera's view. When this image was finished, we could return to the upper level and light the furniture even though it was now dark.


9:21 PM
Now that it was well after dark, this image could be completed because no windows were visible.

In this case, it took good planning, 2 cameras, 7 halogen lights on light stands, 2 assistants and 4 hours from beginning to end to make the raw photographs. It would take another 6 hours to process and finish these images.


Shooting into the sun-Not

 Twice recently, I have been faced with a situation where I expected to make a daylight interior view at the end of the day, but had to abandon it because the sun was setting directly into my lens.  Call it Fate, Murphys Law or whatever.  I would like to think I can execute every photograph just like I imagined it. As it turns out, life can take you down a different path.

If you are making interior views and the sun is above and behind some trees or buildings in the window, then the difference between those shadows outside and the mid-tones inside is about 4 stops.  For example, my ordinary interior daylight view is exposed at about 1/13 sec f8 at ISO 200.  Outside, the sun mid-tone exposure is 1/200 at f 16 (sunny 16). The shadows would be about 2 stops less, or 1/200 f/8.  The whole stops from there to the interior exposure would be 1/100, 1/50, 1/25, 1/13. Thus, the shadows outside are just recoverable highlights at the 1/13 sec exposure.  To get more information than that in the windows of your photograph, HDR and masking techniques of less exposed variations are needed.

Now, if the sun is setting into the lens through the window, reflections of the sun on the glossy surfaces like the floor or polished granite will be even more overexposed. A hazy summer sky with the sun behind it might be 10 stops or more overexposed! That is much more than can be layered and look good.  Fortunately, we are talking about the end of the day, so a solution is near at hand, if you can adapt.


Sun setting through door lites and upper windows
Here is my solution:

Wait for the sun to set beyond the horizon and expose at tungsten white balance! I use halogen hot lights but you can also put tungsten gels on your flash units. (We should try that experiment together some time).

Dusk interior version of photo above-Final
The dusk interior view is magnificent by comparison.  All the details in the interior shadows and highlights are visible. Same composition, but your eyes are trained on the flow of the room. The textures and colors come alive. It satisfies my endeavor: If you are in my customer's demographic, I believe you can see yourself living there.

The challenge of photographing neutral interiors

I recently had the opportunity to photograph one of my customer's beautiful model homes.  The interior decor was very neutral, yet I put a fair amount of work into making the photographs look that way.

Here is a case where your brain sees neutral colors but the camera chooses one color balance and the neutral colors shift based on the light source.  Objects closer to the windows are bluer and those further away are influenced by the incandescent lights and are recorded as more orange.  The same happens when compact florescent lights are in use, but there is extreme yellow saturation near the lights.

Below is a photograph of the kitchen as photographed with tungsten gels modifying the daylight output of the flash units. In these conditions, 1/2 or 1/3 of the flash unit is covered with an orange tungsten correction gel.  I have spent many years looking and identifying these colors, so don't be surprised if you don't see much difference.  My high quality photography is the sum of a dozen or more factors (timing, composition, camera, lighting, etc.), and this is just one. I have provided a second image that super saturates everything so you can better see the areas that are too blue.

Kitchen as captured in one exposure


Same image super saturated to illustrate blue areas
The first step is to make an image that is color corrected to the bluer areas and blend it into the photograph using Photoshop layers, a layer mask and brushes.  This next photo is chosen for its neutral daylight areas.  It is made at a shorter exposure so that some highlight details can be brought in as well.


Image adjusted for daylight balance
When these two are combined, some other details are attended to, and perspective control is applied, this is the final result.  It appears as neutral as you would see it when you toured the model home.


Final kitchen image


Our 2014 Regal Award Win: Best renovation over $50,000

Summary
This Second Empire style victorian mansion, located in Middletown DE, was built in 1877 as the family home of Benjamin Biggs, Delaware’s 46th governor. It was designed to last many generations, but after 130 years, considerable neglect resulted in an infested, dysfunctional, energy-intense house.
The scope of the renovation covered the entire house and grounds. The goal was to modernize the home while maintaining its historic fabric and make it an energy-efficient gem of victorian glamor. 

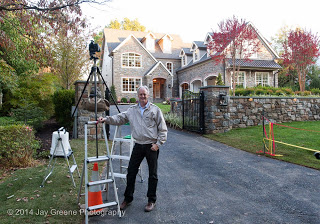
 Images ©2013 Jay Greene Photography. All rights reserved.

 The Historic Renovation story:
Built in 1877 by Benjamin Biggs, Delaware's 46th Governor, this home was designed to show off his success and to last many generations. It is a superb example of the French inspired Second Empire Victorian style.
The 6,000 square foot mansion, located in Middletown DE, was structurally sound but suffered from deferred maintenance. Although extensive renovations had been done in some areas, other areas suffered considerable neglect. Penetrations and rot gave home to various interlopers from bees, birds and bats to feral cats and a homeless man.
With a “Walk Score” of 89 out of 100, it also offers the opportunity to live in an opulent and unique home, having generous room sizes with 12 foot ceilings, massive brick and plaster walls, tall windows, decorative plaster moldings and unique period luxury. The 1970s additions posed their own challenges, but they added 1,000 square feet to the first floor of the original design and improved the traffic flow around the house.
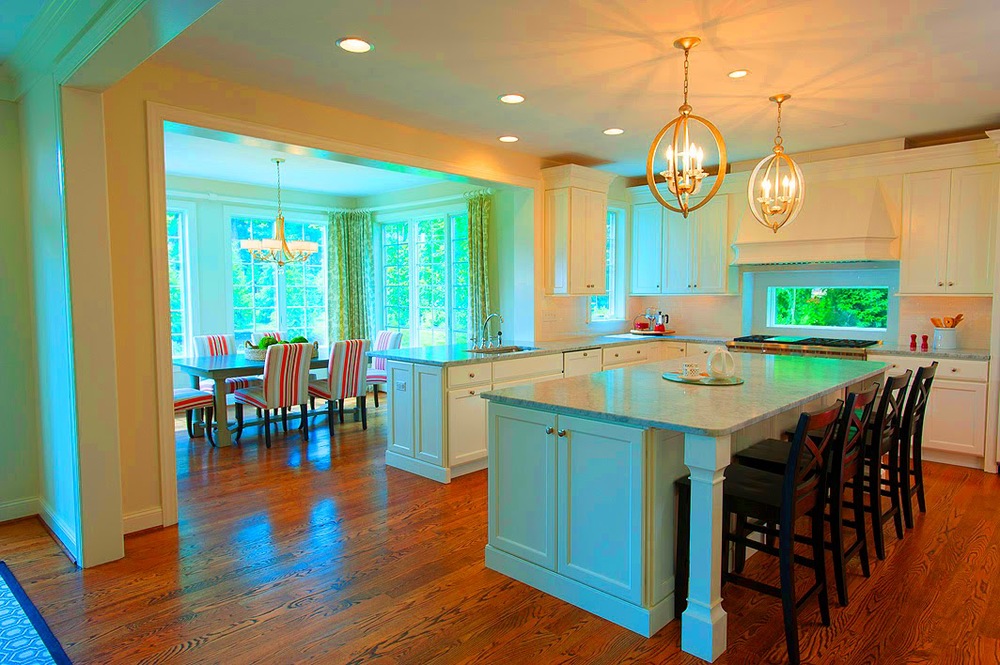
The objective was to start with a neglected, infested, dysfunctional, energy-intense house and make it an energy-efficient gem of victorian glamor. While this statement may sound simple, there are a myriad of restoration choices to consider. The goal was to modernize the home while maintaining its historic fabric. The scope of the renovation covered the entire house and grounds.
Doing much of the work personally and using contractors as needed kept the total cost of renovation to just over $120,000. The cost of the roof and the copper gutter were $30,000; the geothermal HVAC and mini split heat pump were $42,000; pool and landscaping were $10,000. 
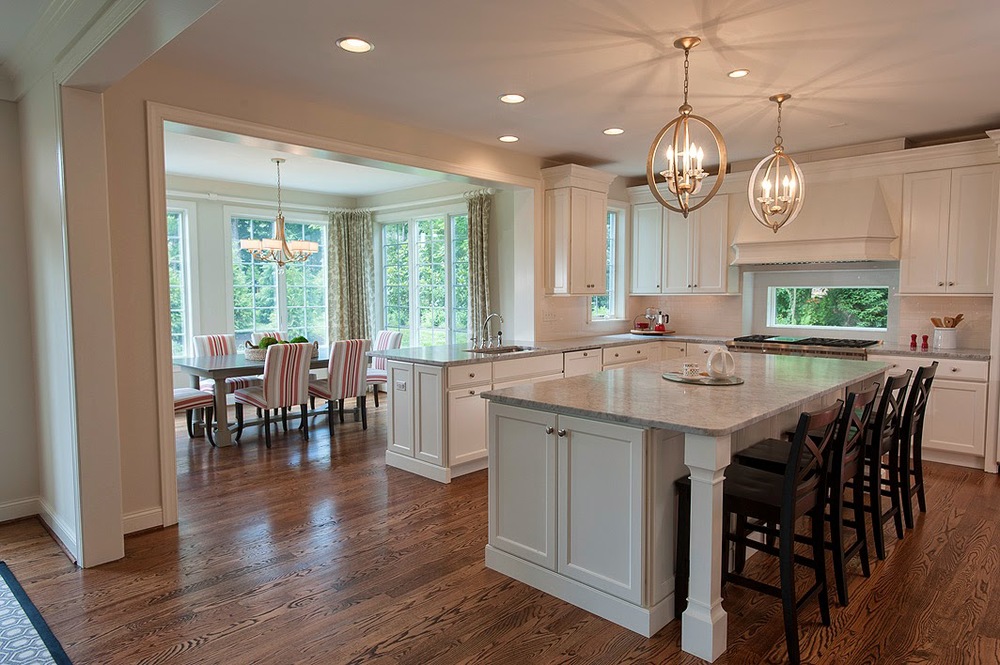
The balance was used for kitchen appliances, materials, paint and labor for hire.
Short list of accomplishments:
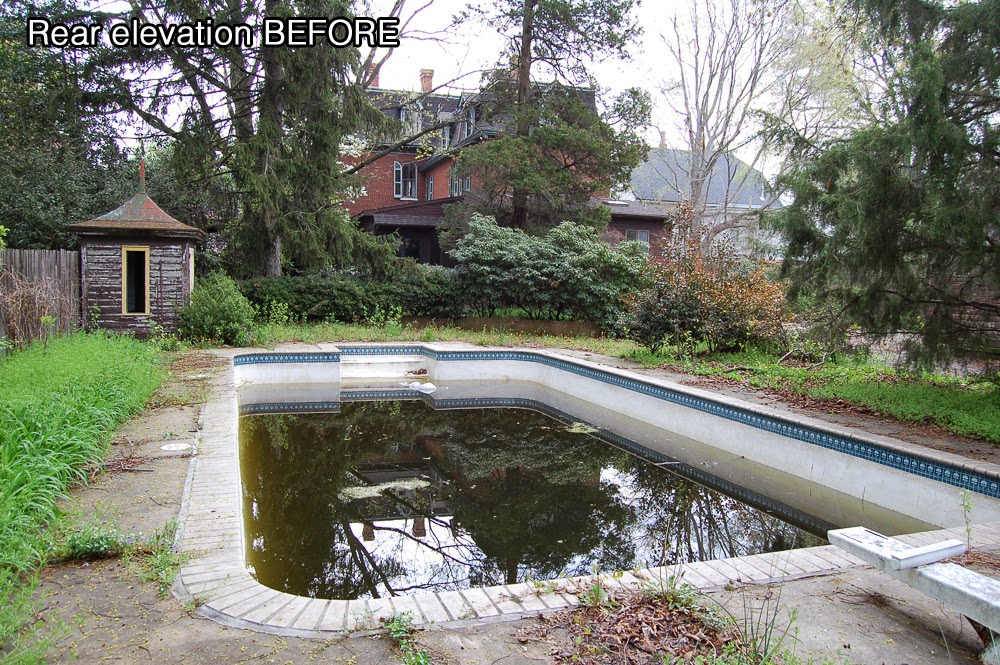
The gunite pool was made fully operational by mucking it out, acid cleaning it and installing new equipment. Five large trees were removed, vines were stripped from the siding, landscaping was trimmed and removed from close proximity to the house. The soil was re-graded to allow proper runoff.
The entire $100,000 budget could have been spent replacing the mansard roof with an exact replica of the original in slate. Instead, a CertainTeed asphalt shingle product was chosen. The roofer ran a pattern of horizontal bands of 3 rows of rectangle, 3 rows of bevel, etc. to mimic the original. In the 19th century, painters would scrape and paint the 10 inch wide metal gutters, 30 feet off the ground, without a ladder, every 5 years. That is impractical today, so maintenance-free copper gutters were fabricated by a skilled coppersmith.
On the exterior, some areas were painted simply to complete a color scheme while the 1970s additions had rotted siding and soffits replaced. The original wood window sills, gutter boards, their support brackets and dormer spindles were replaced as needed or renewed with epoxy and painted in 4 colors.
Inside, some rooms were only painted and carpeted, while others were completely gutted and transformed. In the master bedroom, missing moldings were re-created and wallpaper that mimicked the original metallic flower petal pattern was used on the ceiling. It was upgraded by adding an antiqued faux gold foam trim and a salvaged 
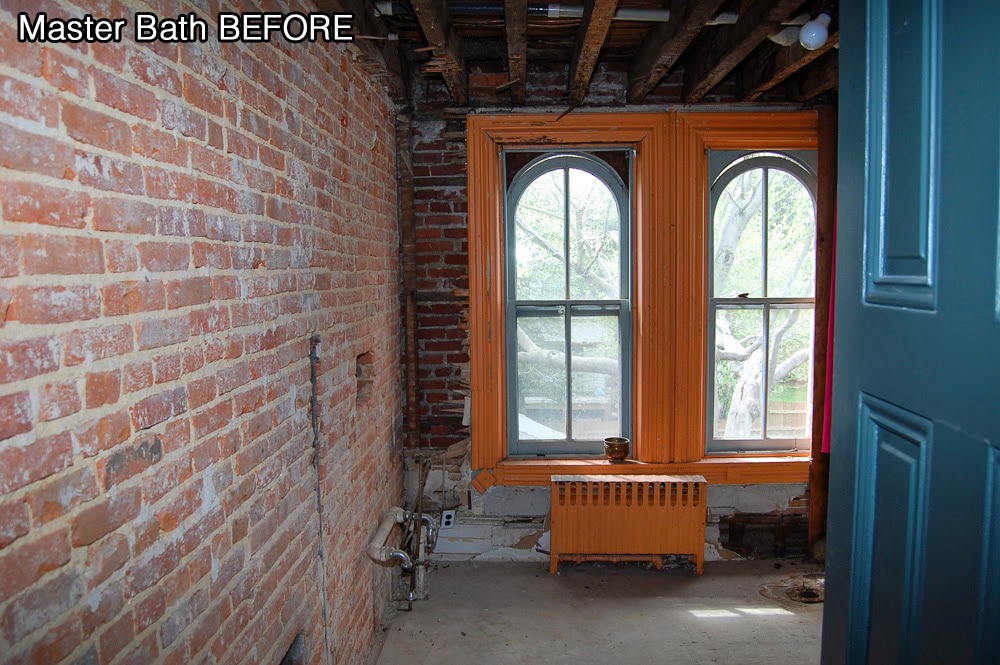
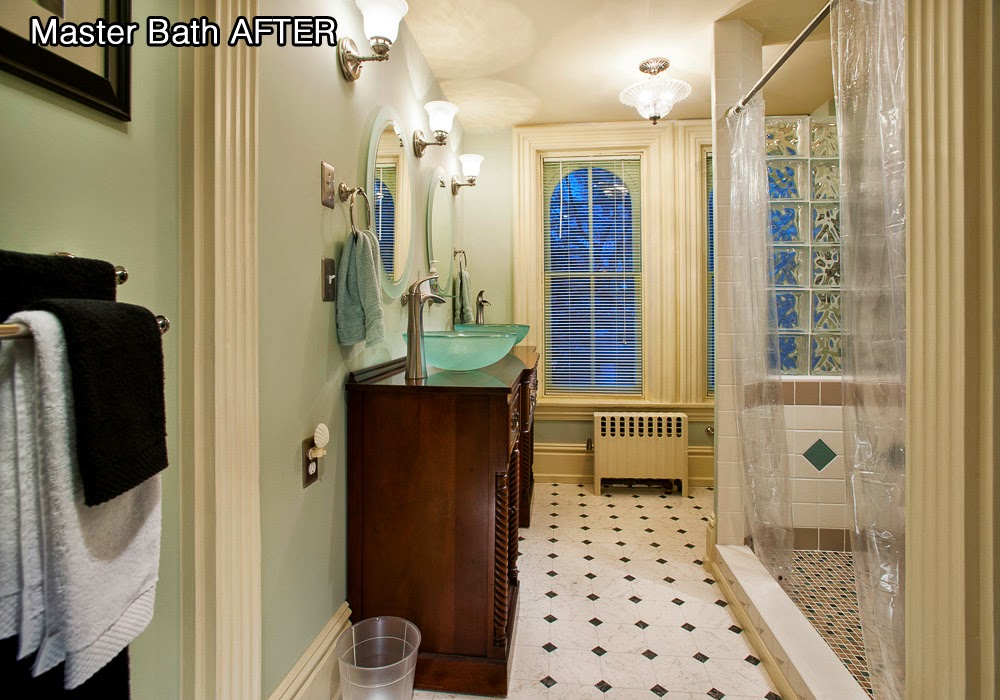
silver pendant chandelier. The second floor master bath was finished like the owners’ water closet, as was the original concept. The vanity was purchased at auction. Originally a dining room sideboard, it was fitted with vessel sinks and pump style faucets on sale at Home Depot.
Asbestos remediation was carried out and a vapor barrier added in the main crawl space and an underground storage tank was discovered and removed.
Total annual energy use was reduced from over $9,700 the first year to $4,200 per year despite rising energy prices. This was accomplished through a combination of more efficient heating and cooling systems, air infiltration reduction and compartmentalization. The combined savings of $5,500 per year plus state and federal energy rebates made for a system payoff in less than 8 years.
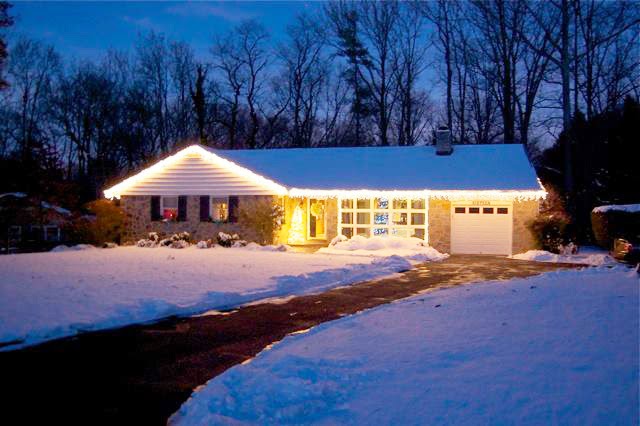
Annually, over 300 visitors come and enjoy viewing the home, as it is a favorite stop on the Odessa Christmas Tour. The owners are stewards of a classic victorian home which serves as a fine example of craftsmanship and style of a romanticized, bygone era.
by Jay Greene
 

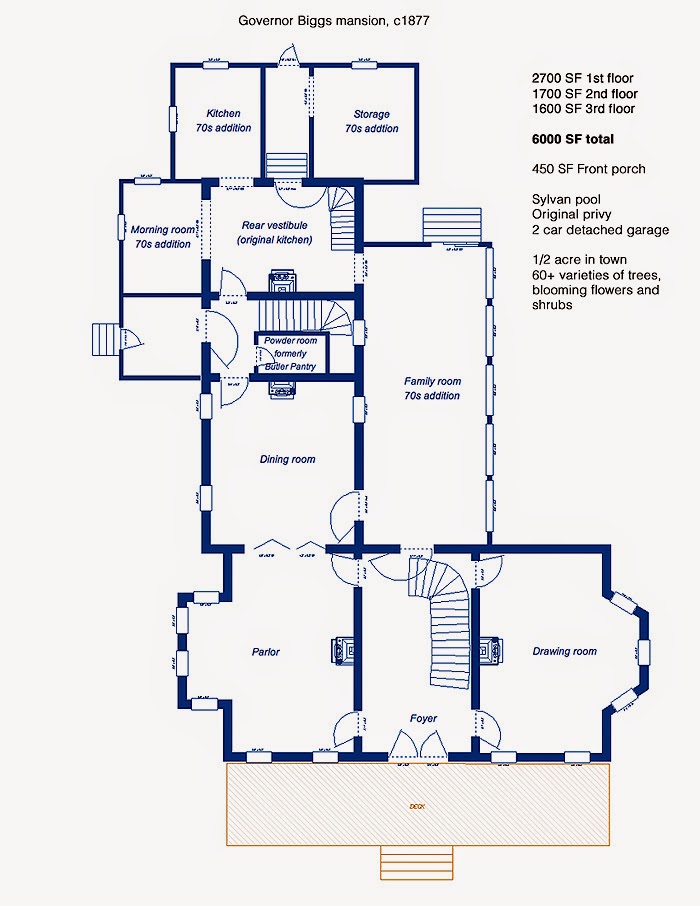
First Floor plan (made using Punch Home Design Studio):

A Study in Contrasts


We had a roller coaster of winter weather here in Delaware during the first week of 2014.  The examples below show the difference between amateur and professional work and that even with weather extremes, high quality professional exterior photography is available year round.

The snow started falling on Thursday evening and we had about six inches fall overnight.  I made the top photo using my pro-sumer Nikon D-40.  I am leaning against a light post to minimize the vibration of the relatively long exposure on Program mode. I would consider this typical of amateur night photography.  There are no added lights, the color balance is off, the shadows are too deep and the highlights are blown out. Snow shots can look great but they are limited to seasonal uses.

Candid style nite view January 3rd
Professional twilight view January 6th


In one day, it warmed from 25 to about 40 degrees and rained all day, removing all traces of snow. The skies cleared as the temperatures dropped again, allowing us to make this night shot for Nobles Pond in Dover.

We added landscape lighting, greened up the grass and made the final photograph from several exposures to keep shadows and highlights under control.


Our builder and architect customers complete their projects year round regardless of the weather. our job is to make their project look pristine in time for their marketing and award entry needs.


We have landed in a great place as we begin a new phase in the growth of Jay Greene Photography.    Our large Co-op office space in the LOMA renovation district in downtown Wilmington is ideal for this next phase.  It gives us easier access to all our customers plus we have access to a large pool of creative professionals.


Our specialty, architectural advertising photography for builders and architects, depends on my ability to bring my skills to bear on each assignment.  I have developed leadership skills so that we can now develop shooters with additional capabilities matched to a spectrum of customer needs and budgets.

Follow us on Facebook to see our newest images and be part of our growing online presence.